Summary
Resources
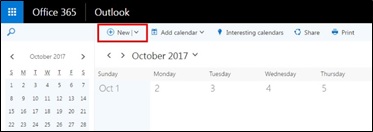
Step 1 Open Calendar
Select New from menu bar at the top of the calendar page.
Step 2 Add an Event Title
Add a Title for the event in the field below Details.

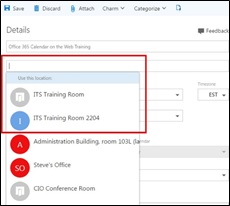
Step 3 Add a location or room
Begin to type location details in the Add a location or a room field. Rooms will begin to populate for selection. Select a location or room from the list OR continue to type location details and hit Enter when finished.
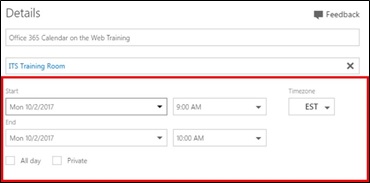
Step 4 Add Start/End dates and times.
- Add a start date
- Add a start time
- Add an end date
- Add an end time
or
- Select the All-day box for all day events
For private appointments, select the Private box.
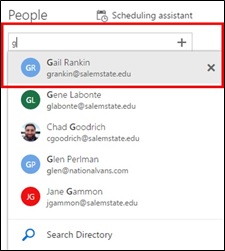
Step 5 Add People
Begin typing first name to add attendees. Be sure to select the correct attendee name from the list or manually add the email address.
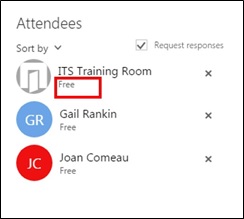
Step 6 Check availability – quick glance
A list of added people and rooms will display. Under the name or location name, availability will display as Free or Busy.
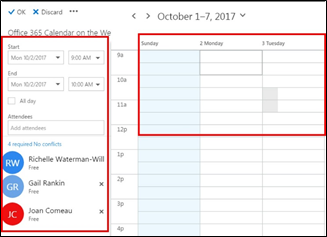
Step 6 cont. Check availability using Scheduling assistant.
You will have a quick view of the availability of selected people and rooms. Additionally, a mini calendar will display for that selected date and time.
There are additional viewing options with the Scheduling assistant.
Select the Scheduling assistant link for more options.

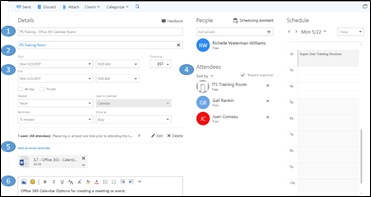
Step 6 cont. Check availability using Scheduling assistant.
Use the Scheduling assistant to change dates and times to display availability of selected people and rooms. You can change the dates and times to check for more open times to schedule the event.
Using the Scheduling assistant is a great way to avoid double booking attendees for meetings and allows for better planning. Keep in mind the time “in between” meetings, taking into consideration locations and travel time between scheduled events.
Step 7 – Review and Send
Before you select the Send button, REVIEW the calendar event for accuracy.
- Review the title
- Verify the location is correct
- Verify the date/time is correct
- Verify the attendee list
- Verify attachments and reminders are correct
- Verify details are correct
Select Send once details are verified.
More Options:
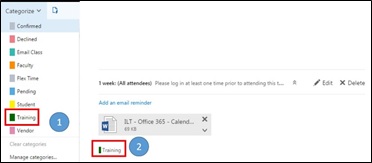
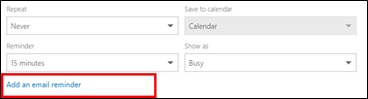
Add an email reminder (optional)
Select the Add an email reminder link below the reminder options.
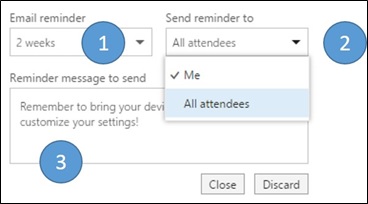
- Select a Time line or email reminder
- Select reminder to Me or All attendees
- Include a reminder message to send.
- Select Close to save or Discard to delete.
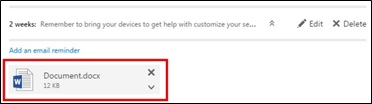
Once the add email reminder is saved, a reminder will display under date and time.
To edit, select the Edit button or to remove
Then select the Delete button.

Attach a file
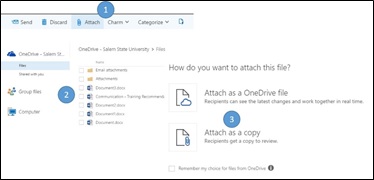
- Select the Attach icon from the top menu bar.
- Locate file from file location.
- Attach as a copy or Attach as a OneDrive file (sharing and editing options available)
A file icon will display the attachment. Verify it is the correct document and correct editing permissions before sending (select the arrow to change permissions of the file).
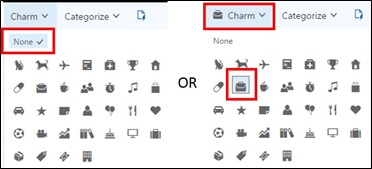
Add a charm
To Add a charm, select the Charm arrow on the menu bar and choose a charm.
or
Select None to remove a charm.
Add a category
To Add a category, select the Category arrow from the menu bar to display existing categories.
Select the Category from the list.
Category for now displays on the calendar event above the message box and below any attachments or reminders as illustrated.