Faculty and Staff have access to network drives they can access from any computer. You might have heard Windows users refer to these as the "U" and "T" drives. These instructions are for connecting to network drives using Windows 10.
On-Campus (connected to the Salem State network)
Click on File Explorer on the Taskbar (or type in This PC in the Search box on the bottom left, and select This PC from the search results).
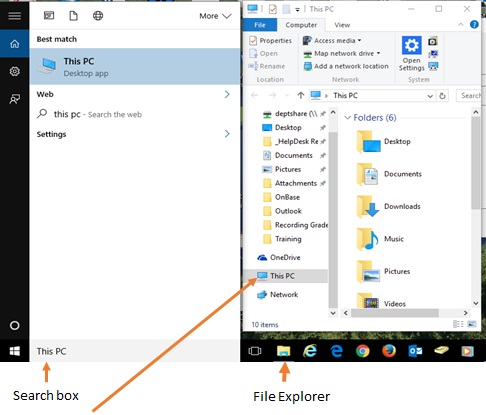
Select This PC from the menu on the left.
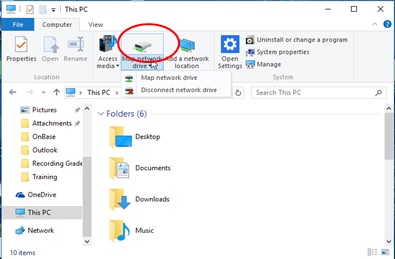
Click on Map network drive from the ribbon menu on top, and then click on Map network drive again.
For your department shared network drive, choose the drive letter (T).
For your personal network drive, choose the drive letter (U).
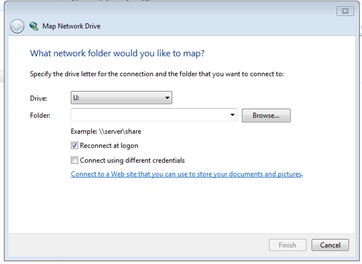
In the Folder box, type the path of the share:
For your department shared network drive (T): \\bow\deptshare\yourdepartmentname.
For example, \\bow\deptshare\ITS.
For your personal network drive (U): \\bow\users\yourusername.
For example, \\bow\users\jdoe.
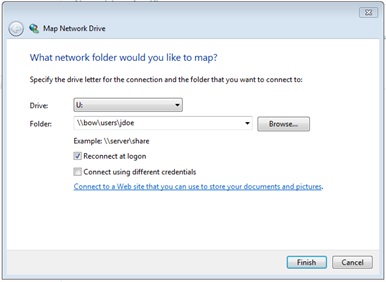
Make sure Reconnect at Logon is selected.
Click Finish.
Follow these steps for each network drive you want to connect to.
Off-Campus
You must connect to the VPN before connecting to a Salem State network drive.
See this page to download and install the VPN GlobalProtect client. Once you have signed into the VPN, follow the directions above to access your drives.