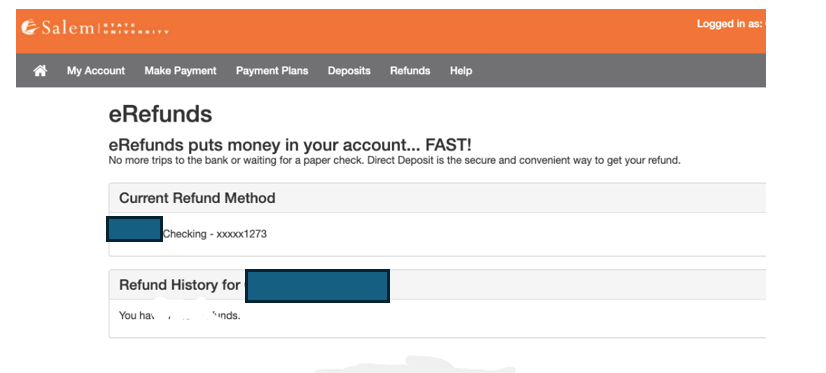
Prerequisite:
The student must have an authorized user approved prior to deposit (How to: Assign an Authorized User | Ask the Viking). Students can only add an authorized user email; the authorized user will add their own name. The authorized user’s name in TouchNet must match exactly what is on the Parent Plus Loan application. If the name does not match, the student will need to remove and reauthorize.
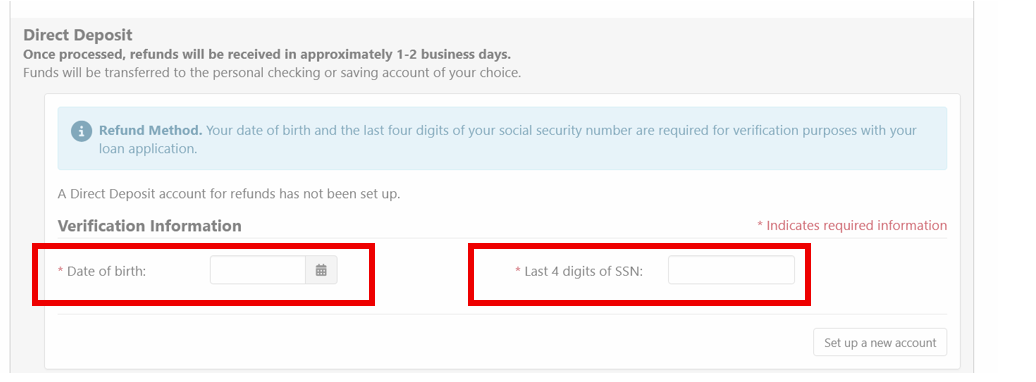
Authorized user who took out the loan, will need to have date of birth and last 4 digits of social security number in TouchNet.
Process:
-
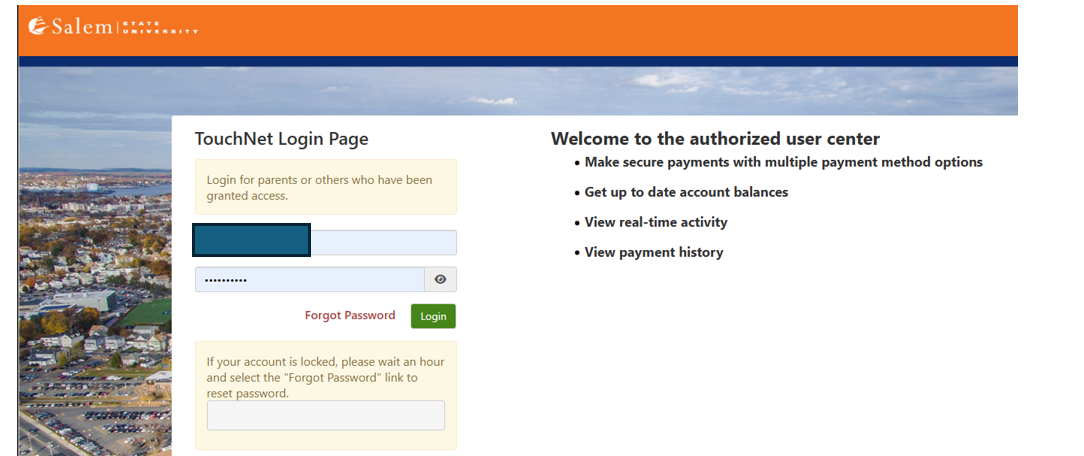
Log in: Login Page
-
Complete required Multi-Factor Authentication (MFA) steps. If this is your first time logging in, you will need to choose a Multi-Factor Authentication option to receive codes to login. Click here for a how-to guide on setting up and using the MFA.
-
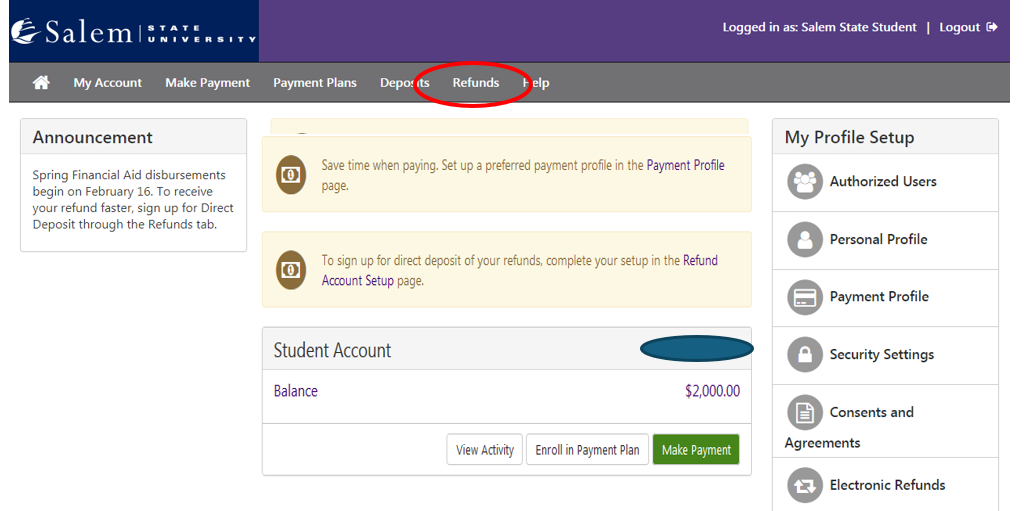
Once at the TouchNet home page, click on “Refunds” in the menu bar at the top of the screen.
-
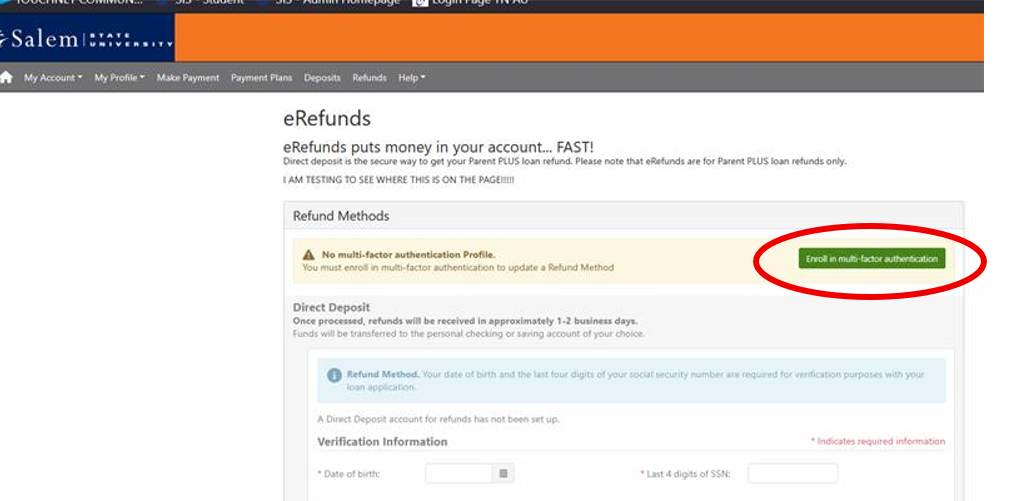
The screen will default to the “eRefunds” page, where you may have to do a two-step verification again. Click on “Enroll in multi-factor authentication”.
-
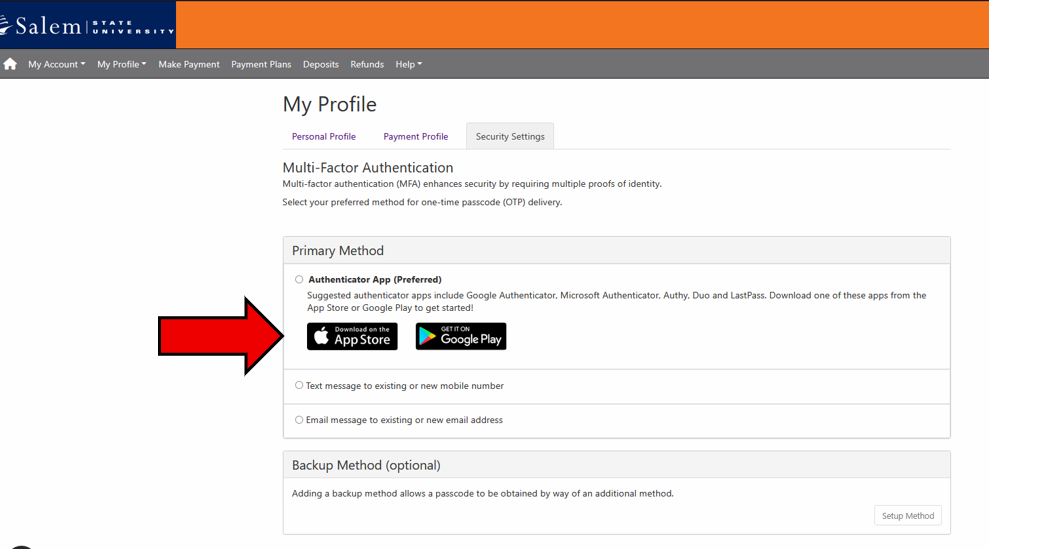
On the Security Settings page, you will have to select how you will get your security code for verification either by text, email or Google Authenticator
-
After verifying your primary method, you can either set up a backup method or continue to click on “Refunds” at the top bar menu.

-
Direct deposit will be an option. Add authorized user date of birth and last 4 digits of social security number. This must match information on loan application exactly. Then select Set Up New Account.
-
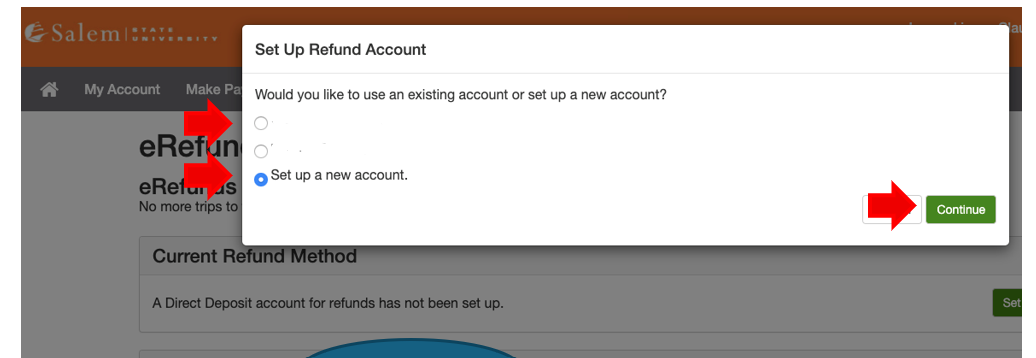
You will be able to pick what account you want to use for your e-Refund. If you already have that account saved, you can choose one of those or set up a new account. Then click continue.
-
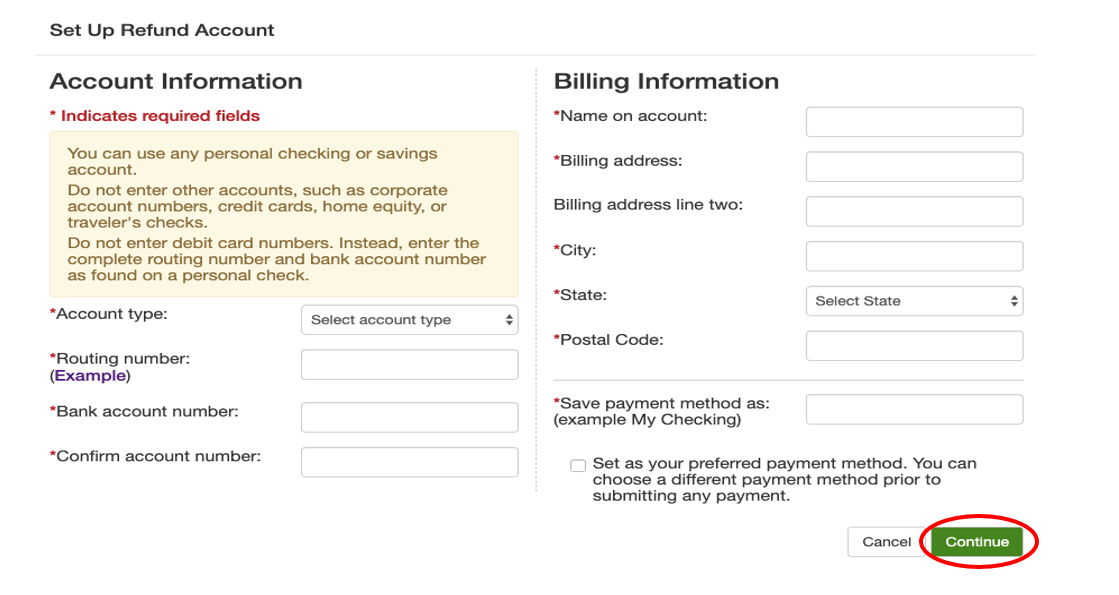
If you need to set up a new account, you will need to fill this information out. Once completed, click continue.
-
You will be redirected to this page, confirming that your e-Refund account has been set up.